Quick Start-Up Guide
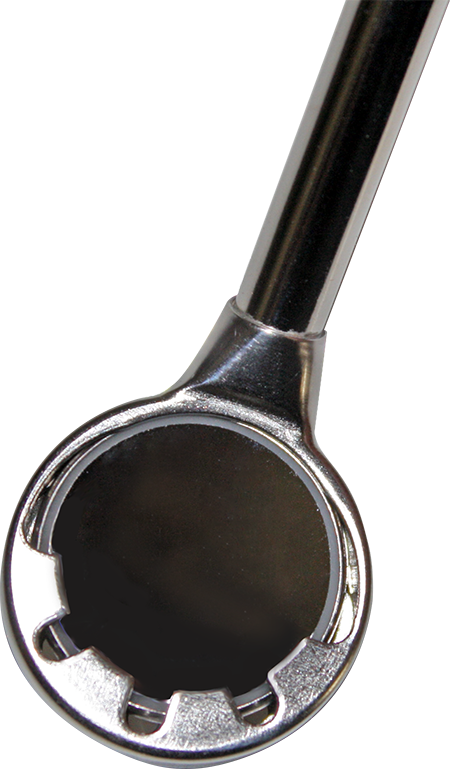
Nu-Bird Suction Mirrors are the ultimate essential instrument that today’s dentists, hygienists and assistants are using in office for suction, viewing and retraction.
1.
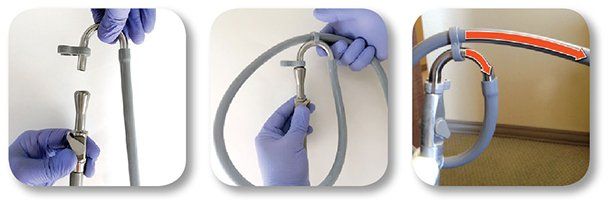
Plug adapter into the HVE. Loop hose as shown using the Ergo Clip attach to the top of the curved metal tube. Point curved metal tube and hose end towards patient’s head. Insert the Nu-Bird suction mirror into the hose end until it clicks in and freely rotates with out falling out.
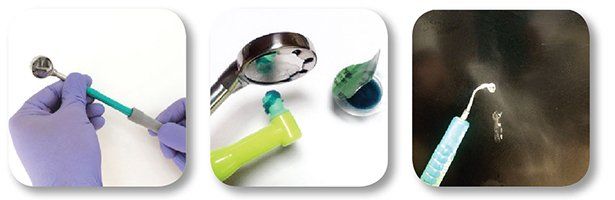
2. Prep mirror with medium grit Prophy paste. Select proper Insert, adjust power and water to appropriate settings.
3. Assess patient for hypersensitivity/gingival sensitivity and treat prior to procedure.
4. Turn on HV suction and practice retraction of the cheek and tongue moving about to develop a saliva coating on the mirror Face. Have patient to close on mirror saying, “Close on this like a spoon,” to remove excess residual water
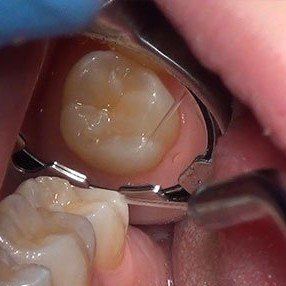
5. INDIRECT VISION can now be used.
- Start on the distals of the maxillary molars and slowly work toward the anterior of the mouth.
- Keep the mirror face “wet” with ultrasonic spray occasionally “dipping” the mirror back against the tongue to the sides and back of the oral cavity to manage any excess pooling water.
Sealant Placement
STEP 1
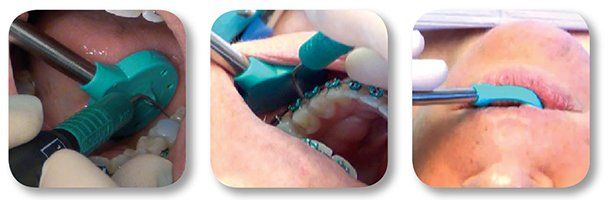
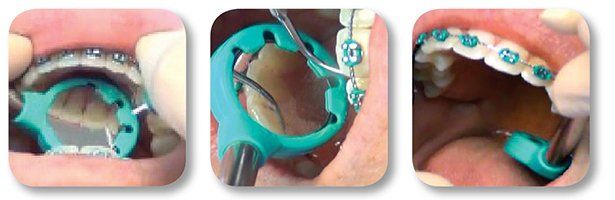
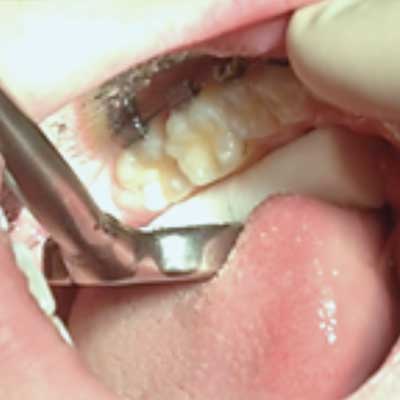
Place Dry Angle on Buccal Mucosa. Place Suction Mirror distal lingual to Lower 2nd molar to retract tongue and manage pooling water and saliva.
Place Dry Angle on Buccal Mucosa. Place Suction Mirror distal lingual to Lower 2nd molar to retract tongue and manage pooling water and saliva.
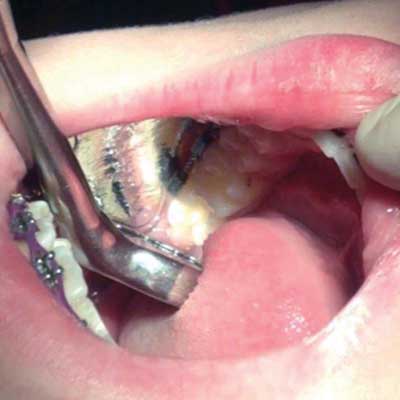
STEP 2
Place etchant on occlusal surface for 30 seconds. Use Suction mirror for retraction and HV suction to manage water/saliva.
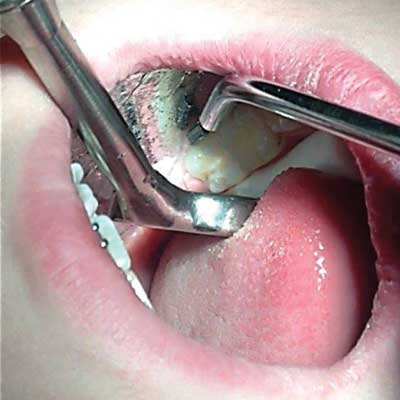
STEP 3
Rinse thoroughly with air/water spray, keeping mirror stationary, retracting the tongue and...
Rinse thoroughly with air/water spray, keeping mirror stationary, retracting the tongue and...
DO NOT DRY TEETH YET
STEP 4
Carefully slide cotton roll under tongue and move suction mirror over to rest on top of cotton roll, keeping the water/saliva away from tooth
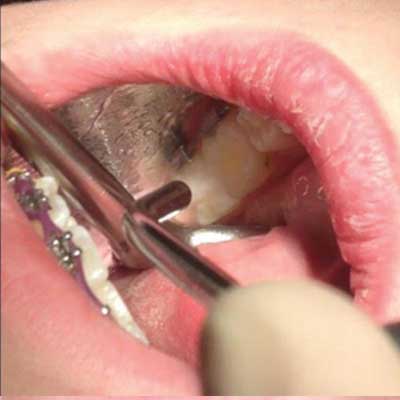
STEP 5
Now carefully dry teeth with air blowing water toward the face of the suction mirror and dry until tooth surface appears chalky or etched.
Now carefully dry teeth with air blowing water toward the face of the suction mirror and dry until tooth surface appears chalky or etched.
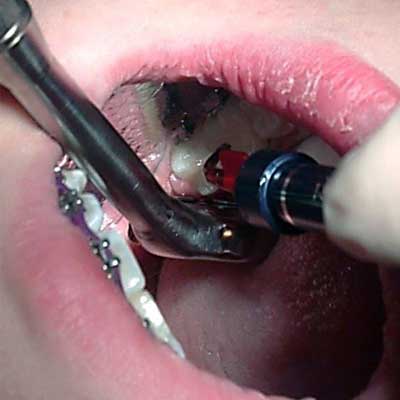
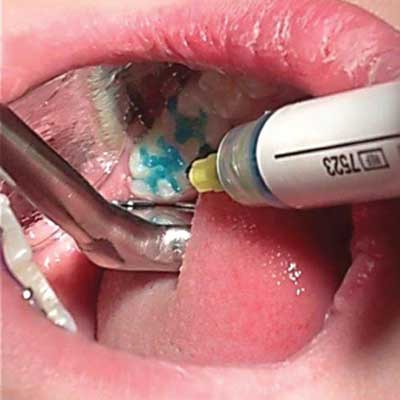
STEP 6
Place Sealant. Keep the suction mirror in a continued stationary position retracting the tongue and suctioning water/saliva away from teeth
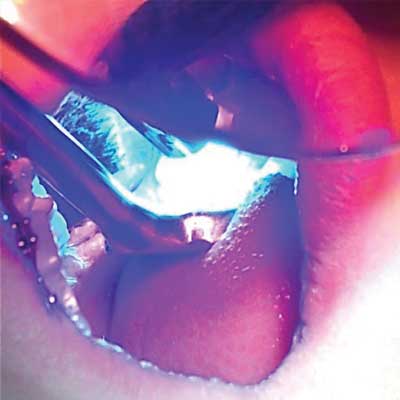
STEP 7
Light cure for 20-30 seconds
Light cure for 20-30 seconds
Dental sealants are easily completed in minutes without
compromising quality and integrity or the need of an assistant.
compromising quality and integrity or the need of an assistant.
Suction Mirror User Tips
Please Read before using your new mirror.
- Water can have a tendency to bead up on the reflective surface due to either a residue coating left from manufacturing which is on the face of every new mirror coin, or it can come from ultrasonic and sterilization chemicals which may not have be rinsed off adequately. As with all dental mirrors, Vaseline and lip products on patients’ lips can be a problem as this may get smeared on the mirror face. Removing residues become necessary to allow clear viewing and preventing water from beading up on mirror with direct water spray. This is a most important KEY STEP: I have found using prophy paste with the prophy cup and lightly polishing the mirror face clears up the problem.
- If water seems to continue to bead up on surface after polishing, it needs repeated polishing until water surface tension is seen spread out on face. When using high speed or ultrasonic equipment, occasionally wet the mirror face to help remove debris. Some have found turning the water flow up helps keep the mirror clear.
- Some suction systems are stronger and display higher volume flow than others. Our suction mirror’s versatility to both high and low volume suction is convenient. If water removal seems unsuccessful with the low volume suction, simply plug it into the high volume unit with our supplied adapter hose. The mirror suction volume capacity operates at 80% the level of a straight HVE tip.
- In rare circumstances, elderly patients or those with xerostomia, buccal mucosa can dry out and may get stuck to the front or backside of the suction mirror. This happens when the suction mirror is left in the same position for a long period of time. The HVE suction can be very powerful. It is recommended to lower the volume on the HVE to reduce suction power and or simply wet the mucosa down with the ultrasonic air water syringe or hand piece. Use extreme caution with all HVE devices on patients with bleeding disorders.
- The suction is very powerful so when possible allow the patient to close on only half of the mirror reflective surface. I usually say (after I have placed the mirror face against either their upper or lower lip), “with your lips close on this like a spoon.”
- The SS suction mirror can be sterilized with other dental instruments i.e. 121º C (250º F) for 30 min. gravity sterilization cycle.
- The Silicone hose is fully autoclaveable if desired otherwise treat as a regular HVE hose. Mirror face should be wiped dry with soft cloth before placing in bag to autoclave to reduce residue buildup.
- I sometimes find it useful for patients who tend to choke and gag easily with ultrasonics to add an additional saliva ejector bent at an angle to fit in the posterior corners of the mouth in order to remove any or all excess water from aerosols with the ultrasonics. I also tell the patient not to breathe through their mouth because they might tend to aspirate the aerosols which may lead to coughing and choking.
Directions for the
Cleaning Mirror and Silicone Hose
The Stainless Steel Mirror should be placed into automated cleaning equipment (ultrasonic cleaner or washer-disinfectant) to remove debris to increase cleaning effectiveness, dried then autoclaved in a steam or statim sterilizer with other instruments i.e. 121º degrees C (250º degrees F) for 30 minutes gravity sterilization cycle. Using a cassette will add protection from scratches to the mirror face. The Adapter hose is fully autoclaveable and designed to hold up under repeated sterilization procedures with longer life than traditional silicon tubing. The hose can also be treated just the same as a regular HVE hose by running suction solution cleaner through it and wipe down with Asepti-wipes.
The silicone hose comes in a 5 ft. lengths and is very lightweight and flexible. This makes it easier to maneuver in whatever position you need it to be.
It is recommended to trim the hose from the end which has the curved fitting to a comfortable working length which does not drag on the floor.
This can be done by removing the curved adapter end from the hose and cutting off at a desired length. Do not remove adapter fitting from end of hose where the mirror plugs into as it will damage the spring which keeps the hose from crimping.
There is also an O-Ring inside the adapter end of the hose where the mirror plugs into which can be replaced when worn out. If the mirror seems to pull out of the hose adapter when you lift it to use, it is not pushed into the adapter end far enough. You should feel it click into place and rotate easily. Sometimes the O-ring inside the adapter fitting gets a little dry and needs to be sprayed with water to moisten so the mirror slides in easier.
Using both hands simultaneously and working in the mouth using High volume suction with indirect view while retracting cheeks or tongue is a brand new skill. Success with this system highly depends on the clinician’s skill level and the ability to use indirect vision with high volume suction and retraction.
Allow time to develop this new skill.
Reprocessing and Sterilization
of the dental instrument Nu-Bird suction mirrors and hose adapter
The Suction Mirror can be placed into an ultrasonic bath for 10 minutes with solution compatible with stainless steel for cleaning prior to sterilization. After removal from ultrasonic bath, the mirrors should be rinsed thoroughly with water and the reflective surface wiped clean before being placed into sterilization bags. The adapter hose portion should be cleansed with water and or mild detergent if needed then allowed to dry and placed into sterilization bags before autoclaving. The HVE Hose adapter will tolerate repeated autoclave cycles. Steam sterilize for 30 minutes at 250 degrees F gravity cycle.